
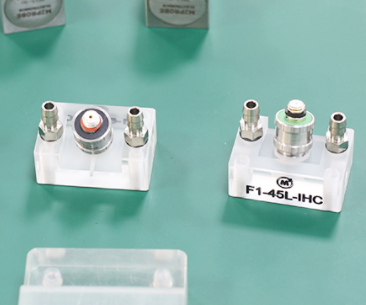

A useful ToFD probe spacing guide starts with one hard rule: do not set probe centre spacing because it worked on the last job. Probe centre separation, or PCS, controls where the sound paths intersect, how well the weld volume is covered, and whether critical indications sit too close to the lateral wave or backwall signal to size confidently.
On a production weld, the wrong PCS can look acceptable in a quick setup check. The scan may have a clean lateral wave, a visible backwall and plenty of amplitude. That does not mean the geometry is right for the thickness, bevel, material or inspection range. Set the spacing from the sound-path geometry first, then prove it on a representative calibration block.
What probe spacing controls in ToFD
A conventional ToFD arrangement uses two angled probes on opposite sides of the weld. One transmits and the other receives. The receiver sees the lateral wave travelling near the surface, the backwall reflection, and diffracted signals produced when the ultrasonic beam encounters an indication tip.
PCS changes the angle and depth at which the transmitted and received beams overlap. With a larger spacing, the main overlap moves deeper into the component. With a smaller spacing, it moves closer to the scanning surface. This sounds straightforward, but the field effect is more nuanced because beam spread, wedge geometry, material attenuation and weld profile all influence usable coverage.
For weld inspection, PCS must support three practical outcomes: clear separation of the lateral wave and backwall signals, enough sensitivity through the target weld volume, and reliable detection and sizing of the flaw types expected in that joint. A setup that gives excellent response from mid-wall lack of fusion may still be weak for near-surface cracking. That is why ToFD procedure qualification matters more than a generic spacing chart.
Start with thickness, angle and target depth
The first calculation is based on material thickness and refracted angle. For a symmetrical probe pair, using the refracting points as the reference, the approximate relationship is:
PCS = 2 × target depth × tan(refracted angle)
Here, the refracted angle is measured from the normal to the test surface. If the objective is to have the beam centre lines meet near the backwall of a plate, substitute the wall thickness for target depth. This gives the approximate full V-path spacing:
PCS = 2 × thickness × tan(refracted angle)
As an example, a 20 mm plate inspected with 60-degree probes gives an approximate refracting-point spacing of 69 mm:
2 × 20 × tan 60° = 69.3 mm
That figure is a starting point, not an inspection instruction. It assumes a flat surface, known refracted angle, a symmetrical setup and no allowance for probe housing dimensions or wedge index offset.
The spacing marked on a scanner is often centre-to-centre distance between probe bodies. The spacing required by the calculation is normally between the wedge refracting points or probe indices. Those may not be in the same location. Measure or obtain the wedge index offset, then convert the calculated PCS into the physical scanner setting. Missing this step is a common reason a setup is several millimetres out before scanning begins.
Choosing the target intersection depth
For a single-wall butt weld, placing the nominal beam crossover near the lower portion of the wall is often a practical starting point. It gives reasonable coverage through much of the section while maintaining a discernible backwall response. The ideal position depends on the procedure and flaw mechanism.
If the concern is root cracking or root lack of fusion, a spacing that favours lower-wall coverage may be appropriate. For cap-side flaws, reducing PCS can bring the useful beam overlap upwards, but it can also increase interference around the lateral wave. Thick-section welds may need more than one ToFD configuration, particularly where a single pair cannot provide dependable coverage from cap to root.
Do not treat the beam crossover as a sharp focal point. ToFD probes have beam spread, and useful diffracted energy can be received outside the nominal intersection. The calculation identifies the geometry you are building around. The calibration block confirms whether that geometry is genuinely usable.
The trade-off between small and large PCS
Small PCS is attractive when near-surface coverage is the priority. The probes sit closer to the weld, the beam overlap is shallower, and cap-side indications may produce stronger responses. The compromise is that lateral-wave activity can dominate the upper inspection zone. A shallow defect can be difficult to separate from the lateral wave, especially when surface condition, coupling variation or weld reinforcement adds noise.
Large PCS shifts coverage deeper and can improve the geometry for root and lower-wall examination. However, the sound paths are longer. On coarse-grained, attenuative or high-temperature material, that can reduce signal-to-noise ratio. Wider spacing can also be impractical where access is restricted, the weld lies near a nozzle, or scanner rails cannot sit consistently on both sides of the joint.
There is no universal ‘best’ PCS. A 50 mm spacing may be sensible for one thickness and angle combination, then completely unsuitable for another. The correct choice comes from the inspection objective, not a preferred scanner setting.
Account for dead zones before the scan starts
ToFD has recognised near-surface and backwall dead zones. These are not failures of the method. They are regions where the lateral wave or backwall reflection can mask diffracted signals from a flaw tip.
PCS affects where those signals sit on the A-scan and image, but it does not automatically remove the dead zones. If your acceptance requirements include potential cap-side cracking, root defects or indications close to the far surface, plan complementary coverage from the outset.
Depending on the job, that may mean a second ToFD scan with different probe spacing, scanning from the opposite surface, or using PAUT to cover areas that ToFD cannot resolve reliably. The practical choice depends on access, weld geometry, client requirements and the procedure. For critical welds, the best setup is often the one that combines methods rather than forcing one configuration to do every job.
Set spacing on the scanner, then validate it
Once the target PCS has been calculated, set the scanner so the actual wedge indices are at the required separation. Check that both probes are aligned with the scan axis and sit at the same distance from the weld centreline. If one probe is offset, the geometry becomes asymmetrical and the resulting image can be harder to interpret and size accurately.
A field-ready setup check should confirm more than encoder movement. Use a representative block with known reflectors or manufactured notches at relevant depths. Look at lateral-wave consistency, backwall continuity, response from target reflectors and the separation between key signals. If expected reflectors sit inside a masked region or give inconsistent amplitude across the scan, reassess the PCS before blaming the probes.
Also check the scan over realistic surface conditions. A polished calibration block can produce an excellent image that bears little resemblance to a weld with cap profile, coating residue, scale or variable couplant film. If the job surface needs preparation, allow for it. A stable, repeatable setup is more valuable than chasing a perfect image in ideal conditions.
Common probe spacing mistakes
The most frequent mistake is using probe-body spacing rather than refracting-point spacing. The next is applying a spacing calculation without verifying the actual refracted angle in the material. Wedge angle is not refracted angle, and substituting one for the other will distort the geometry.
Other avoidable issues include using a PCS developed for a different wall thickness, changing to a different wedge without recalculating index offset, and assuming a visible backwall means full-volume coverage. Another common problem is setting a wide PCS to improve lower-wall coverage, then overlooking the loss of usable signal in attenuative material.
On encoded scans, mechanical stability matters as much as nominal spacing. Probe holders need to maintain separation under cable drag, around circumferential welds and across uneven surfaces. A scanner that flexes or allows the probes to walk changes the geometry while recording. Purpose-built, task-specific scanner hardware helps keep that variable under control, particularly when several weld configurations need to be deployed without rebuilding one system between jobs.
A practical ToFD probe spacing workflow
Before mobilising, establish the material thickness, expected weld profile, accessible scan surface, probe frequency, refracted angle and required coverage. Calculate a nominal refracting-point PCS around the depth of interest, then convert it to the scanner setting using the wedge index dimensions.
At setup, verify actual probe alignment and centreline position. Run the arrangement over a suitable reference block and assess coverage at the depths that matter, not merely whether the image looks clean. Adjust spacing only with a clear reason: to shift the usable overlap, improve signal separation, or meet a validated procedure requirement.
The most reliable ToFD result usually comes from treating PCS as an inspection variable, not a fixed number printed on a setup sheet. When the spacing reflects the weld thickness, sound path and likely flaw locations, the scan gives the technician information they can act on rather than a tidy image with hidden blind spots.